
久々のWord Press関連の記事である。
今更のように、Twitterで本ブログの更新情報を配信しようと試みた。
しかし、最初の1週間で挫折。
手動での更新だったため、毎更新日にTwitterで更新情報を投稿するのは非常に手間だった。
しかし、私が日頃チェックしているブロガーさんのTwitterを見たとき、あることに気づいた。
そのブロガーさんも当然、ブログの更新情報をTwitterで投稿しているのだが、その投稿文は使いまわしで、最後に記事へのリンクを貼っているだけだったのだ。
もしかして、自動でTwitterに投稿しているのでは?
そう思って調べてみると、やはりTwitterの自動投稿が可能であることが分かった。
考えてみれば、ブログの更新情報の投稿などと言う面倒な単純作業など、さっさと自動化してしまいたいと考えるのは当然で、そこに最初に気づかなかったのは完全に私の落ち度である。
そしてWord Pressの場合、自動投稿用のプラグインがあることがわかり、今回導入することにした。
導入手順
① 「WP to Twitter」をインストールし、有効化する。
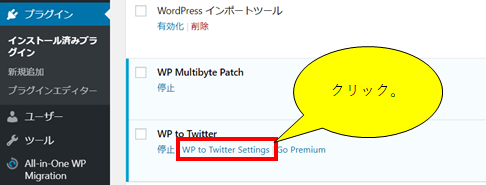
② 「インストール済みプラグイン」を開き「WP to Twitter Settings」をクリックする。
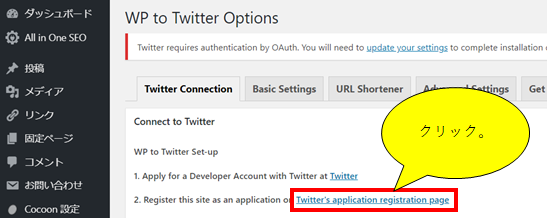
③ 「Twitter’s application registraction page」をクリックし、Twitterアプリケーションの登録用ページを開く。
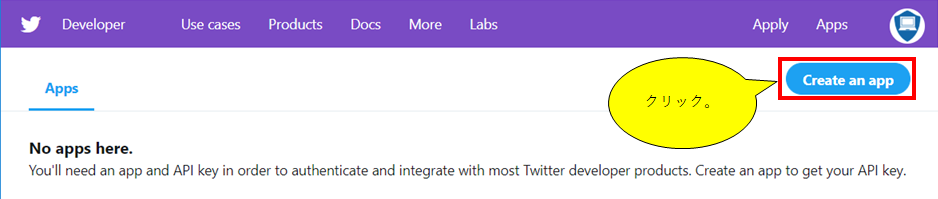
④ 「Create an app」をクリックし、 アプリケーションの詳細設定ページを開く 。
Twitterの開発者登録を行っていない場合、⑤以降とは別の手順を踏む必要がある。
手順の詳細は下記を参照されたい。

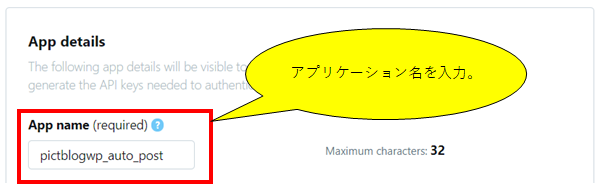
⑤ アプリケーション名を決め、入力する。
制限字数は32字。基本的に名前は何でもOKだが、「Twitter」の単語を入れてはならない。
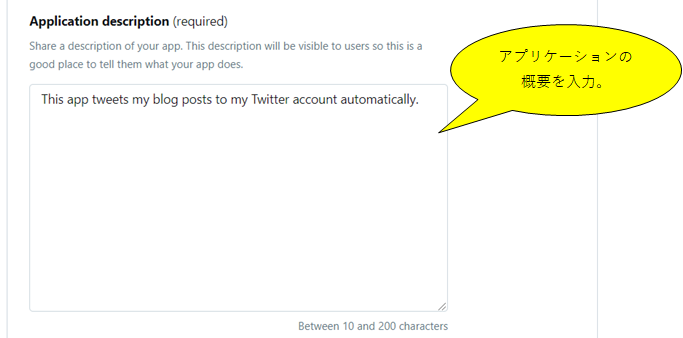
⑥ アプリケーションの概要を入力する。
制限字数は10字以上200字以内。こちらも適当でOKだが、他のユーザーにも公開されるらしいので注意。
⑦ ウェブサイトのURLを入力する。
自分のサイトのURLで良い。

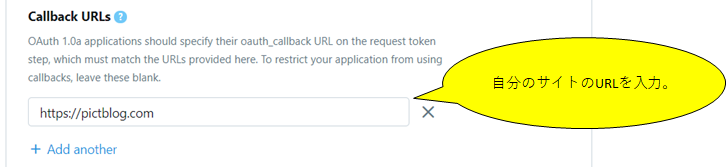
⑧ Callback URLsを入力する。
自分のサイトのURLで良い。
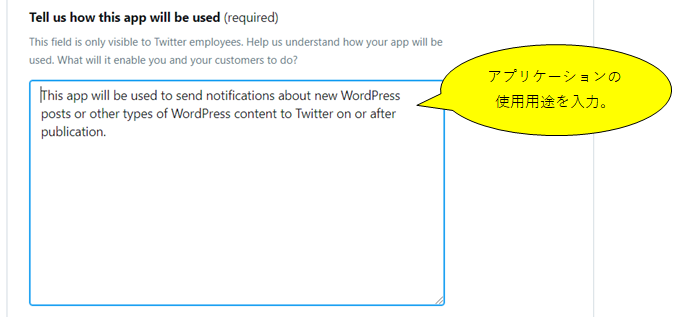
⑨ アプリケーションの使用用途を入力する。
②で開いた「WP to Twitter」の設定画面に例文が載っているので、それをコピペすれば良い。
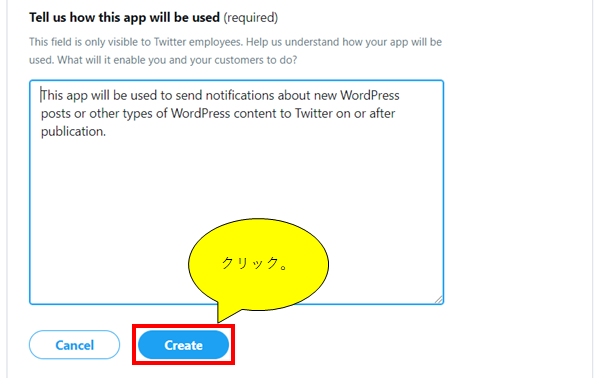
⑩ 「Create」ボタンをクリックする。
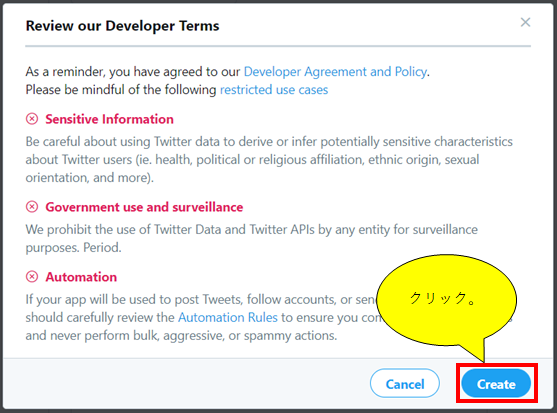
⑪ 下のような画面が出るので「Create」ボタンをクリックする。
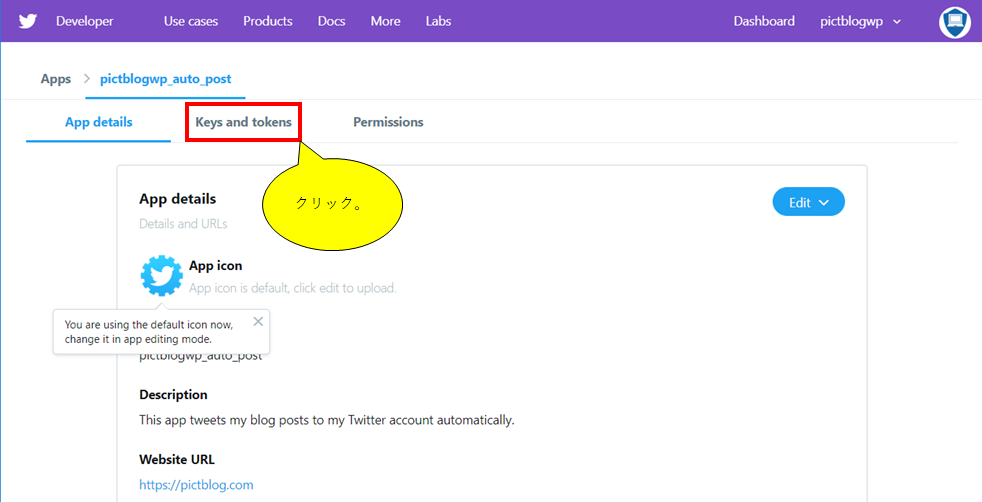
⑫ 下記画面が表示されるので「Keys and tokens」をクリックする。
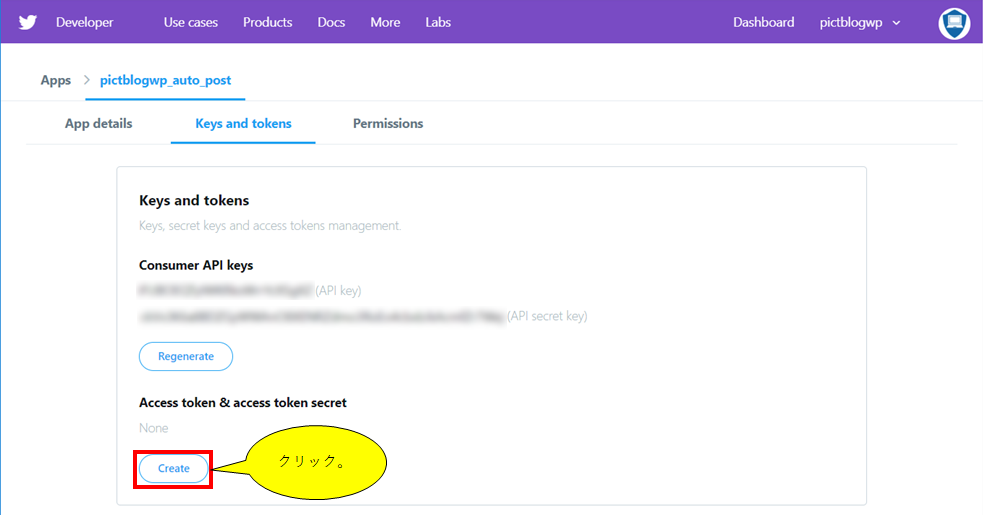
⑬ 「Create」ボタンをクリックする。
⑭ 画面上に表示されている「API key」「API secret key」「Access token」「Access token secret」を控える。
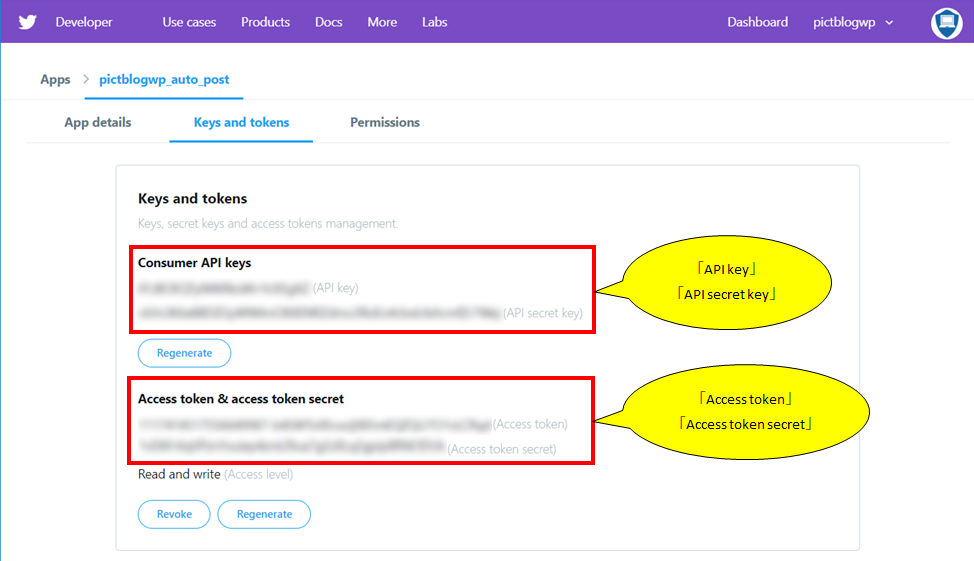
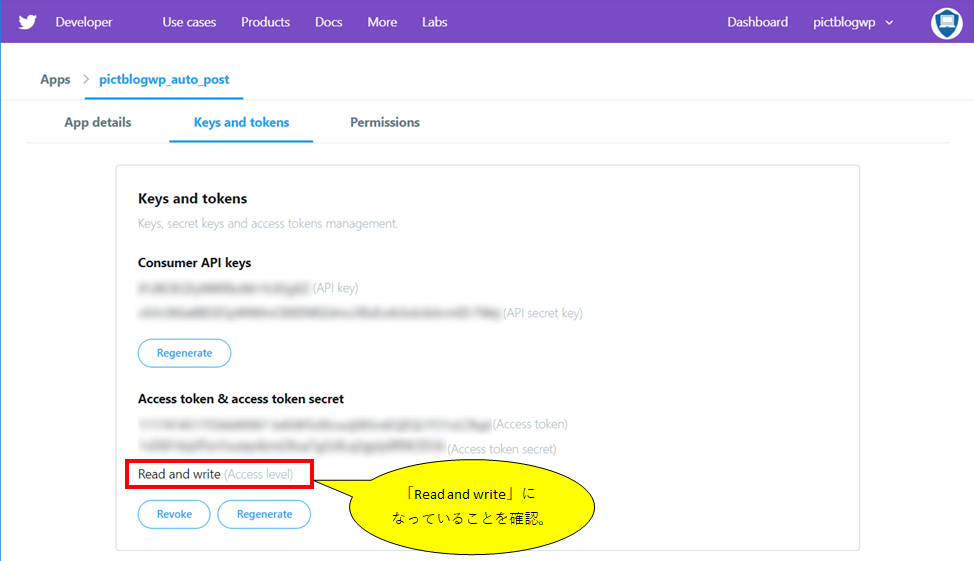
⑭ Access levelが「Read and write」になっていることを確認する。
「Read and Write」以外の場合は、上のメニューの「Permissions」より、設定を変更する。
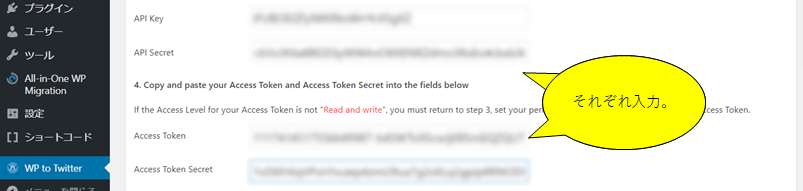
⑮ ②で開いた「WP to Twitter」の設定画面に戻り、⑭で控えた4つの文字列をそれぞれ入力する。
⑯ 「Connect to Twitter」をクリックする。

⑰ 下のような画面が表示されれば、Twitterとの連携が無事に完了。
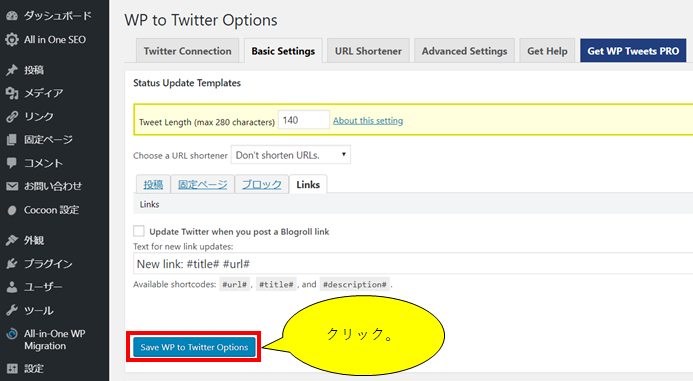
⑱ 「Link」を開き、「Update Twitter when you post a Blogroll link」のチェックを外す。
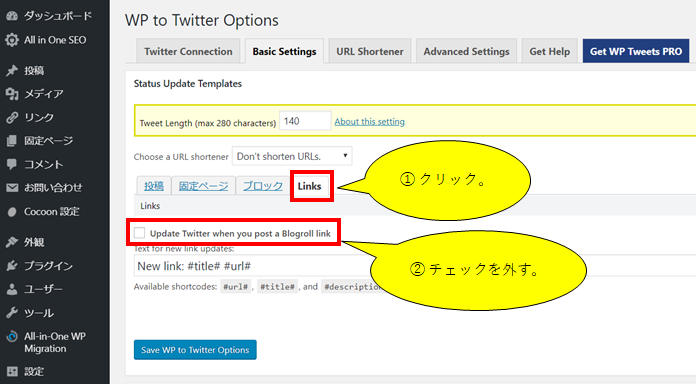
⑲ 「Save WP to Twitter Options」をクリックし、設定を保存する。
設定(テンプレート)
ここで具体的なツイート内容の設定方法を述べる。
まずは、記事公開時に共通で投稿されるテンプレート内容の編集方法である。
ここでツイート内容を編集しておけば、記事公開時にその内容で自動投稿してくれため、一番楽な方法である。
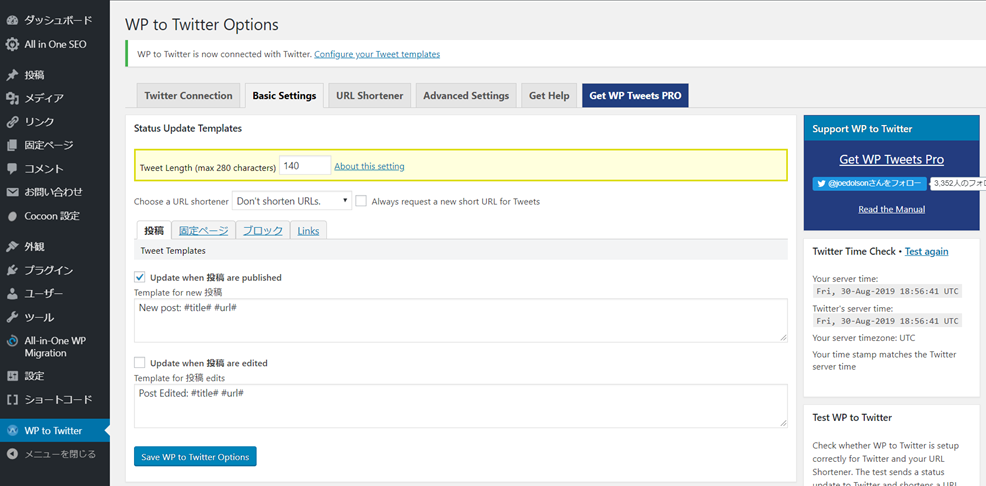
① 「Basic Setting」⇒「投稿」と開く。
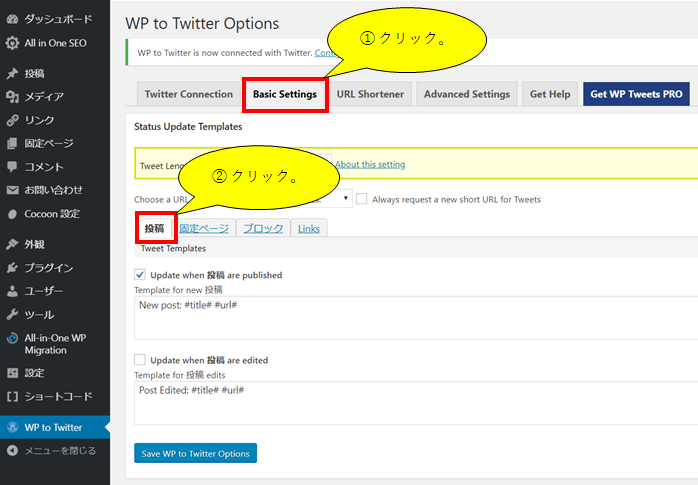
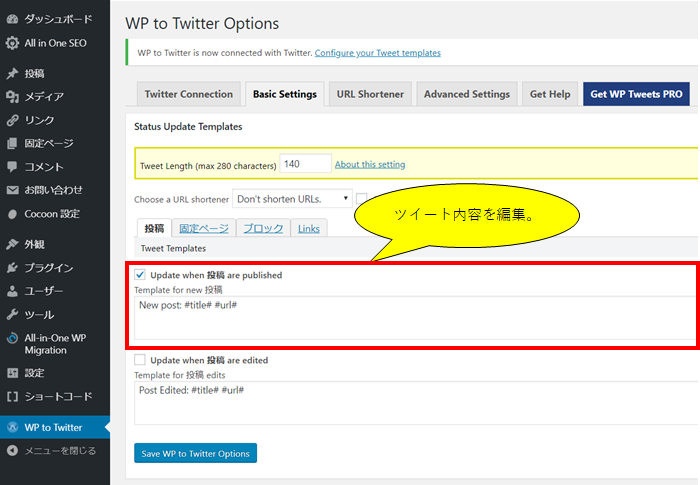
② 「Upadte when 投稿 are published」にチェックを入れ、ツイート内容を入力する。
ここで入力された内容が、記事の公開と同時にTwitterに投稿される。
「#title#」は記事のタイトル、「#url#」は記事のURLに変換される。
他にもブログタイトルやタグなどのテンプレートタグが用意されている。
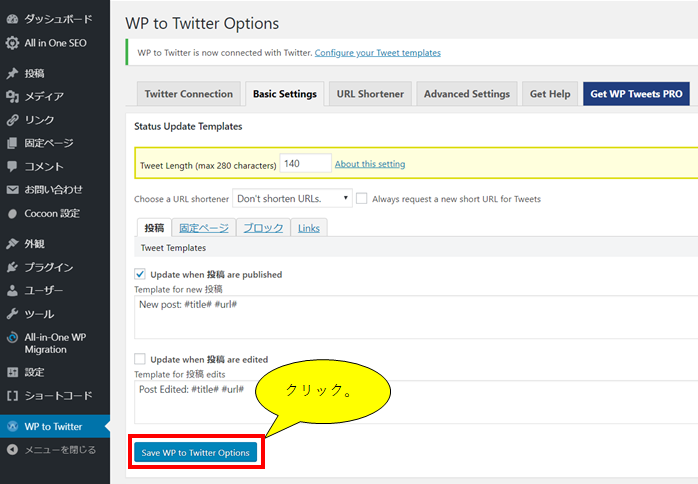
③ 「Save WP to Twitter Options」をクリックし、設定を保存する。
設定(カスタムツイート)
ここでは、記事ごとにツイート内容を編集する方法を述べる。
記事編集時に同時にツイート内容も編集できるため、私はこちらを利用している。
ここで編集しなくとも、前章で編集したテンプレート内容がそのまま投稿されるため、投稿が途切れることはない。
① 任意の記事の編集ページを開く。
② 右側のメニューに「WP to Twitter」のメニューが追加されていることを確認する。
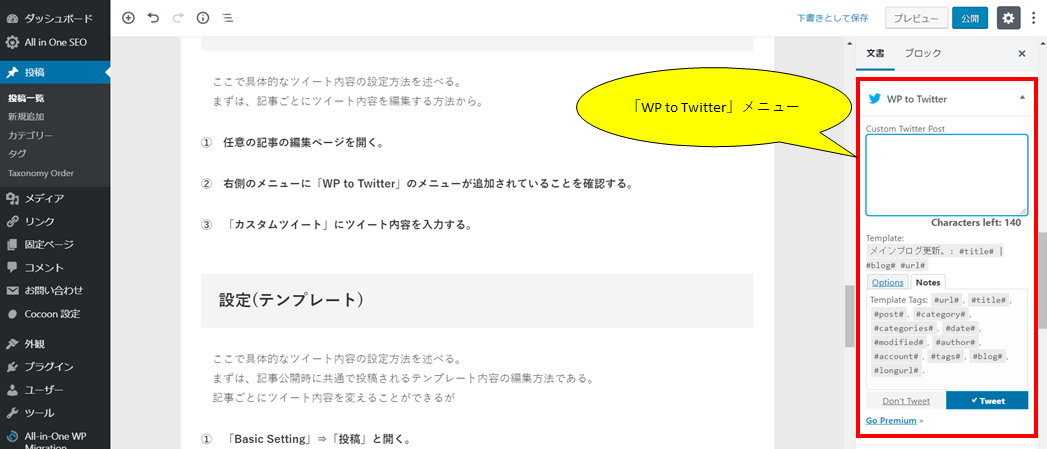
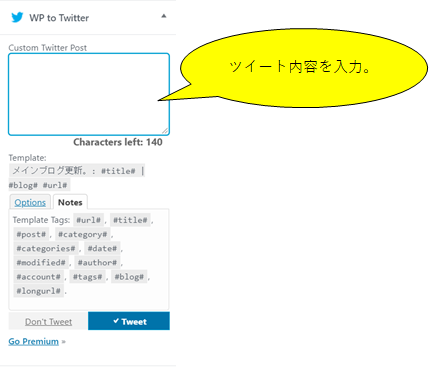
③ 「カスタムツイート」にツイート内容を入力する。
ここに書かれた内容が、記事公開時に自動でツイートされる。
テンプレート編集時に用いたテンプレートタグもそのまま利用できる。
終わりに
Twitterは拡散力がすさまじいためどうにか利用したかったが、1つ有効な方法を見いだせてほっとしている。
やはりそれなりの働きはしてもらわねば。
END


コメント